CARVIN
Easy20 - 35 min7 steps·Original on iFixit ↗

1997-2003 Chevrolet Malibu Tail Lights Replacement

Replacing burnt out or broken bulbs is a quick and easy fix that makes your car easier to see from behind, helping to prevent accidents.

Tools (1)

Parts (3)

Step-by-step instructions

Step 1 · photo 1
1
  • Locate the plastic casing that holds the trunk liner in place, directly behind the tail light.
  • Unscrew the plastic casings.
Step 2 · photo 1
2
  • Make sure to put some pressure on the tail light itself so it does not fall out when you unscrew it.
  • Unscrew the three plastic wing nuts located behind the tail lights.
Step 3 · photo 1
3
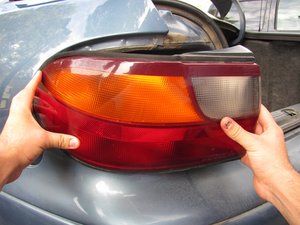
  • When the tail light assembly comes loose, do not fully remove it because it may damage the connected wires.
  • Carefully pull the tail light away from the car to expose the connected wires.
Step 4 · photo 1Step 4 · photo 2Step 4 · photo 3
4
  • Unclip the rear panel of the tail light assembly. There are two clips on the top and two on the bottom.
  • Remove the rear panel from the rest of the assembly.
Step 5 · photo 1
5
  • Do not pull on the bulb, handle it gently because it is fragile.
  • Grab the plastic base of the bulb and gently wiggle it free.
Step 6 · photo 1
6
  • When handling the new bulbs, avoid touching the glass as much as possible because this can reduce the life of the bulb.
  • Gently push the new bulb into the plastic housing.
Step 7 · photo 1
7
  • After putting the new bulbs in, turn the desired lights on to check that the newly installed bulbs work correctly.
  • These bulbs have different functions including blinkers, brake lights, hazard lights, and back-up lights. They will only turn on when the necessary signal is sent.

Conclusion

To reassemble your device, follow these instructions in reverse order.

Guide content belongs to iFixit, license CC BY-NC-SA. Open original

Замена задних фонарей Chevrolet Malibu 1997-2003 гг. — Carvin Garage · Carvin