CARVIN
Moderate1 h12 steps·Original on iFixit ↗

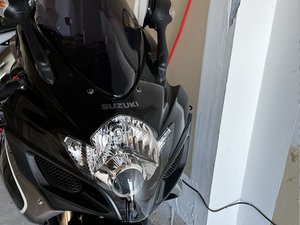
2006 Suzuki GSX-R600 Front Brake Master Cylinder Replacement

This guide demonstrates how to change a front brake master cylinder on a 2006 Suzuki GSX-R600. This repair might be needed if your brake lever is touching your handlebar when depressed. This is not the easiest process, but by following this guide, you should be able to do it on your own and save some money! Check the tools section for required tools. Purchase a new master cylinder if yours is damaged and/or old.

You'll need a bit of patience, as this repair can take some time. Be patient and follow the steps carefully.

Before beginning, make sure your bike is off and fully cool, then throw on a pair of nitrile gloves.

Tools (5)

Parts (6)

Step-by-step instructions

Step 1 · photo 1Step 1 · photo 2Step 1 · photo 3
1
  • Turn the bike off and allow it to fully cool. Put nitrile gloves on before beginning.
  • Use a 3/32 inch Allen key to remove the bolt securing the brake lever.
Step 2 · photo 1Step 2 · photo 2Step 2 · photo 3
2
  • Place a rag directly under the hose connection to catch any break fluid spills.
  • Use pliers to remove the clamp at the end of the reservoir hose.
  • Empty the brake fluid into an empty container.
Step 3 · photo 1Step 3 · photo 2Step 3 · photo 3
3
  • Use an 8 mm socket attached to a 3/8 inch ratchet to remove the two bolts.
Step 4 · photo 1Step 4 · photo 2Step 4 · photo 3
4
  • Grip the boot with your pliers and pull it out of its housing.
  • Use snap ring pliers to remove the snap ring behind the boot.
Step 5 · photo 1
5
  • Use pliers to pull out the spring and piston assembly.
Step 6 · photo 1
6
  • Check the condition of the master cylinder, and clean the cylinder with brake cleaner. Dry it with a rag.
  • If your master cylinder is corroded or in poor shape, you will need to buy a new or used master cylinder assembly and replace it.
Step 7 · photo 1
7
  • Fit the new seals onto the piston.
  • Use a bit of new brake fluid as lubrication.
Step 8 · photo 1
8
  • Place the new spring and piston back into the cylinder.
Step 9 · photo 1
9
  • While holding the piston and spring down, use snap ring pliers to place the snap ring in the same orientation that it was taken out.
  • Use pliers to push the assembly together.
Step 10 · photo 1
10
  • Replace the rubber boot.
Step 11 · photo 1Step 11 · photo 2Step 11 · photo 3
11
  • Use an 8 mm socket attached to a 3/8 inch ratchet to secure the two bolts.
  • Use pliers to pinch the clamp until it is in the right position like the photo.
  • Replace your brake lever, then tighten the single bolt using a 3/32 inch Allen key.
Step 12 · photo 1Step 12 · photo 2Step 12 · photo 3
12
  • Remember to bleed the system while adding new fluid!
  • Refill the brake fluid reservoir to the appropriate level with new brake fluid.
  • Perform a quick test by pulling the brake lever and check that the front brake is functioning properly.
  • Congratulations! You are all done and ready to ride!

Conclusion

Your front brake is now working as intended!

Guide content belongs to iFixit, license CC BY-NC-SA. Open original

Замена главного тормозного цилиндра Suzuki GSX-R600 2006 года — Carvin Garage · Carvin