CARVIN
Easy20 - 30 min6 steps·Original on iFixit ↗

2017 Chevrolet Traverse Cabin Air Filter Replacement

In this guide, you will learn how to replace a 2017 Chevrolet Traverse Cabin Air Filter. You should change your vehicle's cabin air filter every 12,000-20,000 miles. Changing your cabin air filter can reduce health risks by filtering out pollens and pollutants, helping reduce odors coming from your vents, and improving air circulation in your vehicle.

Parts (1)

Step-by-step instructions

Step 1 · photo 1Step 1 · photo 2
1
  • Open the glove compartment.
Step 2 · photo 1Step 2 · photo 2Step 2 · photo 3
2
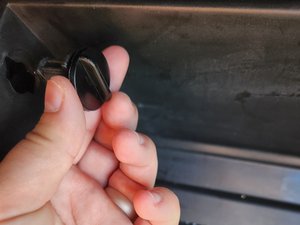
  • Using your fingers, twist the two fasteners counterclockwise then pull to remove them.
Step 3 · photo 1Step 3 · photo 2Step 3 · photo 3
3
  • On the right side of the glove box, there is a damper. Pull the damper up and then out.
  • This will allow the glove box to fully extend downward.
  • To avoid damage, secure the glove compartment box with your free hand so that it does not drop when you release the damper.
Step 4 · photo 1Step 4 · photo 2Step 4 · photo 3
4
  • Use both hands to pull down on the plastic cabin air filter cover to remove the it.
Step 5 · photo 1
5
  • Remove the old cabin air filter and properly dispose of it.
Step 6 · photo 1Step 6 · photo 2
6
  • Insert the new cabin air filter into the compartment.
  • Pay special attention to the directions on the cabin air filter. The writing should be facing you and the air-flow arrow should be facing downwards.

Conclusion

To reassemble your device, follow these instructions in reverse order.

Guide content belongs to iFixit, license CC BY-NC-SA. Open original