CARVIN
Moderate40 min - 2 h20 steps·Original on iFixit ↗

How to Tighten the Alternator Belt on your 1990-1993 Honda Accord

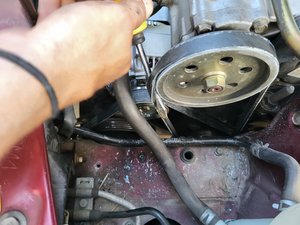
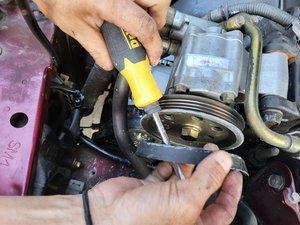
If your 1990-1993 Honda Accord makes a squeaky noise when turned on and at low speed, it might be because one of the alternator belts isn't tight enough. In this demonstration, we tightened both alternator belts by adjusting the screws that are too loose.

Before starting this guide, leave the car running with the hood open. This will help you locate where the noise is coming from. However, turn off the car for a few minutes before starting the guide. When the car is turned on, the engine heats the car parts under the hood, and working under the hood while the car is still hot might cause burns.

Accessing some of the screws in the tightening component of the repair can be difficult. You can access these screws by lifting the black hose and choosing different extension sizes to find the one that provides the best access.

One challenge you may encounter is the difficulty of accessing the screws. It's advisable to have a comprehensive wrench tool kit at your disposal to experiment with different extensions until you find the one that allows you to access the screws effectively. Be prepared to repeat the entire process if, on the first attempt, the belt wasn't tightened sufficiently.

Before starting the repair, ensure that your car is turned off, in park, and with the emergency brake engaged. This is crucial because the repair involves disconnecting the battery and the brake system. Ignoring these warnings could lead to injury.

Tools (2)

Step-by-step instructions

Step 1 · photo 1Step 1 · photo 2
1
  • Before you begin, make sure your car is off and in park with the emergency brake engaged.
  • Pull the hood release inside the driver's side door.
Step 2 · photo 1Step 2 · photo 2
2
  • Move to the front of the car.
  • Reach under the hood and release the hood latch.
  • Lift the hood.
Step 3 · photo 1Step 3 · photo 2Step 3 · photo 3
3
  • Find the prop rod and lift it to prop the hood up securely.
  • Under the hood, it will look like photo 3. Take note of the following components:
  • Battery
  • Alternator
  • Brake System
Step 4 · photo 1Step 4 · photo 2
4
  • Make sure the car is turned off before disconnecting the battery.
  • Use a socket wrench to loosen the 12 mm bolt on the red battery terminal.
Step 5 · photo 1Step 5 · photo 2
5
  • Use a socket wrench to loosen the 12 mm bolt on the black battery wire.
Step 6 · photo 1Step 6 · photo 2Step 6 · photo 3
6
  • Disconnect the negative battery terminal.
  • Disconnect the positive battery terminal.
Step 7 · photo 1Step 7 · photo 2Step 7 · photo 3
7
  • Disconnect the brake system.
Step 8 · photo 1Step 8 · photo 2Step 8 · photo 3
8
  • Remove the 10mm bolt securing the brake system using the socket wrench with extension and a long socket.
Step 9 · photo 1Step 9 · photo 2Step 9 · photo 3
9
  • Use the socket wrench with an extension and a long 10 mm socket to remove the 10 mm bolt securing the brake system on the other side.
Step 10 · photo 1Step 10 · photo 2Step 10 · photo 3
10
  • Disconnect the black hose.
  • Remove the brake system and set it out of the way.
Step 11 · photo 1Step 11 · photo 2Step 11 · photo 3
11
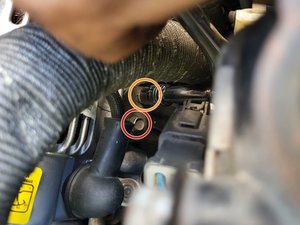
  • Use a socket wrench to remove the 14 mm bolt above the top belt.
  • In case it's too stiff, use an extension to create more power.
Step 12 · photo 1Step 12 · photo 2Step 12 · photo 3
12
  • Remove the 10 mm bolts found under the top part of the alternator using a socket wrench with an extension.
  • The left screw will lower the alternator if unscrewed and raise it when screwed in. The right screw keeps the alternator in place.
Step 13 · photo 1Step 13 · photo 2
13
  • Lower the alternator by about 3.2 mm.
  • If it's too stiff, use a plastic hammer.
Step 14 · photo 1Step 14 · photo 2Step 14 · photo 3
14
  • Use a screwdriver or other long object to remove the top belt.
Step 15 · photo 1Step 15 · photo 2Step 15 · photo 3
15
  • Tighten the 10 mm bolts under the bottom part of the alternator hidden by the black hose (where the red arrow points) using the socket wrench.
  • It's especially important to tighten the right screw/bolt.
Step 16 · photo 1Step 16 · photo 2
16
  • Check the tightness of the belt with a finger test. If you can press it down, tighten the belt a little more.
  • Continue tightening the screws and checking the belt until there is no slack in the belt.
Step 17 · photo 1Step 17 · photo 2
17
  • Remove the 10 mm bolts under the top part of the alternator with a socket wrench.
  • This will allow for an easier reinstallation of the top belt.
Step 18 · photo 1Step 18 · photo 2Step 18 · photo 3
18
  • Reinstall the belt around the bottom and top wheel.
Step 19 · photo 1Step 19 · photo 2Step 19 · photo 3
19
  • Use the socket wrench with the extension to screw the left and right 10 mm bolt until the belt is tight.
  • This step may be confusing because it is hard to know which direction the bolt needs to move. The bolt will move slightly inwards and that will tighten the belt.
Step 20 · photo 1Step 20 · photo 2
20
  • Tighten the top 14 mm bolt with the socket wrench.

Conclusion

To reassemble your device, follow these instructions in reverse order.

Guide content belongs to iFixit, license CC BY-NC-SA. Open original

Как подтянуть ремень генератора на Honda Accord 1990-1993 годов выпуска — Carvin Garage · Carvin