CARVIN
Very easy15 min8 steps·Original on iFixit ↗

Engine Air Filter Replacement, Chevrolet Aveo 2011

This Guide covers Engine Air Filter Replacement on the Chevrolet Aveo 2011

Step-by-step instructions

Step 1 · photo 1Step 1 · photo 2Step 1 · photo 3
1
  • Replacing the engine intake air filter in Chevrolet Aveo (2011 European model) is a very simple maintenance task.
  • The replacement can be postponed further if you see that it is in fairly good condition. I change it every 15,000 km when I change the oil. I prefer not to rush it and I change everything on the same day.
  • We unscrew the four screws on the cover. it is not a matter of removing them, they remain in the plastic cover.
Step 2 · photo 1Step 2 · photo 2Step 2 · photo 3
2
  • Loosen the screws, raise the cover and push it towards the front so that it doesn't strike the upper edge.
  • This leaves us with a perfect opening to be able to remove the filter.
Step 3 · photo 1Step 3 · photo 2Step 3 · photo 3
3
  • We remove the filter and clean the interior space of any dust remnants and leaves using a cloth or brush, if we have a vacuum cleaner, it makes it much faster and easier to clean.
Step 4 · photo 1Step 4 · photo 2Step 4 · photo 3
4
  • We compare the filter to be replaced and the new one to ensure they are identical.
Step 5 · photo 1Step 5 · photo 2
5
  • In my case, when I buy the same brand and model again, they are identical.
Step 6 · photo 1Step 6 · photo 2Step 6 · photo 3
6
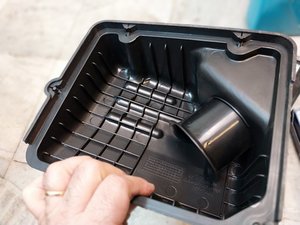
  • I never usually do this, but since I was doing the guide I took the opportunity to release the cover from the clamp and wash it with water and dish soap so that it is perfect.
Step 7 · photo 1Step 7 · photo 2
7
  • In this case, since the cover is not in place, it is very simple to insert the filter, which is very easy to position by observing the spacing of the screws.
  • Without removing the cover, lifting it also allows insertion without problems.
Step 8 · photo 1Step 8 · photo 2Step 8 · photo 3
8
  • We replace the cover and tighten the four retaining screws.
  • END of the Guide.

Conclusion

To reassemble your device, follow these instructions in reverse order.

Guide content belongs to iFixit, license CC BY-NC-SA. Open original