CARVIN
Easy30 min13 steps·Original on iFixit ↗

Guide 1B: Seat ATECA Engine Air Filter Replacement. (More details and tips).

Step-by-step instructions

Step 1 · photo 1Step 1 · photo 2Step 1 · photo 3
1
  • A document, a supplement to the Teardown 1 that I published some time ago; in this case, I have performed the filter change again and am providing some details that may be helpful.
  • [https://es.ifixit.com/Gu%C3%ADa/Seat+ATECA+-+Motor+1000+cc+-+56CV++Gasolina+sustituci%C3%B3n+filtro+de+aire+motor./159566|Guide 1:]
  • For the removal of the front screw of the bracket, I advised you to place a cloth underneath to catch the screw if it falls when you take it out.
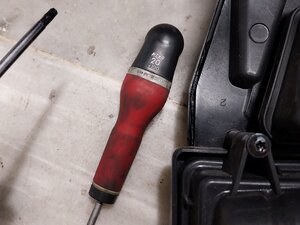
  • Two other tips: Use a T30 Torx screwdriver; the T27 also works, but the T30 is better.
Step 2 · photo 1
2
  • 2nd tip: it is much better if the screwdriver is magnetized; if it is not, you can use your finger to help hold the screw when removing and inserting it.
Step 3 · photo 1Step 3 · photo 2Step 3 · photo 3
3
  • To disassemble both the front and rear clamp, it is very useful and convenient to use a nut and a zip tie; note that to close the zip tie, we will have to use pliers to tighten and close the clamp, which will serve to keep it in the open position.
  • [https://www.youtube.com/watch?v=cpGYDTYoHYY|Example Video.]
Step 4 · photo 1Step 4 · photo 2Step 4 · photo 3
4
  • A very useful addition for this procedure is the use of a nut, which is for a size 13 nut driver.
Step 5 · photo 1Step 5 · photo 2Step 5 · photo 3
5
  • For the rear clamp, using the nut and the flange is a bit more complex, but the big surprise was that this effort pays off when reinstalling the bracket: with the clamp open, the filter bracket almost slides into the clamp on its own as soon as you align it with the tube.
Step 6 · photo 1Step 6 · photo 2
6
  • To remove the filter screws, use a Torx T20 driver bit or Torx screwdriver.
Step 7 · photo 1Step 7 · photo 2Step 7 · photo 3
7
  • Remove the used filter and clean the entire support with a brush.
Step 8 · photo 1Step 8 · photo 2Step 8 · photo 3
8
  • We will compare the filters to verify they are exactly the same. My advice is to mark the date of the change and the mileage at that moment so you can keep track of when to perform the next change.
  • I also note it down on a sheet and keep the photos.
Step 9 · photo 1Step 9 · photo 2Step 9 · photo 3
9
  • The electric screwdriver is very useful for the filter teardown.
  • Once the filter is replaced, we will use the electric screwdriver for reassembly, but be careful not to tighten it all the way so as not to break the plastic; the last 2 turns should be done by hand with a manual T20 Torx screwdriver.
  • Photo 2: If we apply a little petroleum jelly to the anchor rubber seals before installing the filter, the filter will easily slide onto the stems as soon as it is set in place.
Step 10 · photo 1Step 10 · photo 2Step 10 · photo 3
10
  • Support the bracket by finding the position of the pins; with the help of petroleum jelly and the zip tie holding the rear tube clamp, the bracket is positioned on the rear tube quite easily. You can assist it by pushing with your hand on the center of it.
Step 11 · photo 1
11
  • CAUTION: To cut the zip tie while salvaging the nut and zip tie.
  • ***1st DO NOT do it directly with scissors, the nut will fly off just like the metal clamp, which can catch your fingers.***
Step 12 · photo 1Step 12 · photo 2Step 12 · photo 3
12
  • 2nd My advice is to use a piece of paper towel, a rag, or thick mechanic's gloves when holding the clamp and zip tie; you will avoid pinching your fingers and minimize the blow the metal clamp can cause.
Step 13 · photo 1Step 13 · photo 2
13
  • For Seat Ateca air filter and cabin air filter models, check online with your vehicle model to see which type of filter your engine uses.
  • END of Guide.

Conclusion

To reassemble your device, follow these instructions in reverse order.

Guide content belongs to iFixit, license CC BY-NC-SA. Open original

Руководство 1B: Замена воздушного фильтра двигателя Seat ATECA. (Подробнее и советы). — Carvin Garage · Carvin