CARVIN
Easy20 - 40 min8 steps·Original on iFixit ↗

2005 Volkswagen Jetta Tail Light Replacement Guide

Brake lights are a critical safety feature, and when one burns out, it can put drivers at risk of accidents or tickets. Replacing the bulb is simple and something any car owner can do with basic tools. This guide will cover tail light bulb replacement for the 1999-2005 (MKIV) VW Jetta platform. (It can also be used to replace a brake light and turn signal light)

Before you begin, here’s what to know:

  • Vehicle & Part Details: This guide covers tail/brake-light bulb replacement for all MKIV Jetta models (1999–2005). The bulb provides both tail-light and brake-light functions on each side of the vehicle.
  • When to Replace: Replace the bulb if one side of your brake lights does not illuminate when pressing the brake pedal, or if the dashboard bulb warning appears.
  • Safety Note: Always make sure your vehicle is parked on a level surface with the engine off. Allow the light housing to cool before handling it.
  • Tools Required: Only a pair of clean gloves is needed to keep your hands clean and prevent oils from touching the new bulb’s glass surface.
  • What You’ll Achieve: By following this guide, you’ll safely replace the burned-out bulb and restore full brake-light functionality, ensuring your car remains safe and road-legal.

Tools (1)

Parts (3)

Step-by-step instructions

Step 1 · photo 1Step 1 · photo 2
1
  • Make sure vehicle is parked on a level surface and turned off.
  • Pull the release trunk button located in the driver's side door, or press and hold the open trunk button on the key fob to open the trunk.
Step 2 · photo 1Step 2 · photo 2Step 2 · photo 3
2
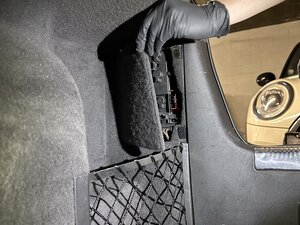
  • Open panel cover by detaching the hook and loop fastener swinging it open.
Step 3 · photo 1Step 3 · photo 2Step 3 · photo 3
3
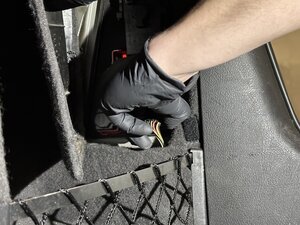
  • Disconnect the taillight housing connector by pinching the sides of the plug and pulling outwards.
  • Unplugging with take a small amount of force, careful not to pull on the actual wires.
Step 4 · photo 1Step 4 · photo 2
4
  • Tuck the connector out of the way to prepare for removing the tail light housing.
Step 5 · photo 1Step 5 · photo 2Step 5 · photo 3
5
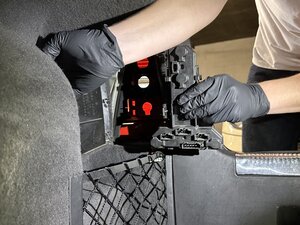
  • There are two clips, one on each side, that hold the tail light housing in place. Pinch the clips inward, towards each other, to unclip the housing.
  • Once unclipped, the housing can rest freely in its place.
Step 6 · photo 1Step 6 · photo 2Step 6 · photo 3
6
  • Start removing the housing by simple twisting and pulling. Removing one corner at a time until the whole part is able to be removed.
  • Careful of glass bulbs.
Step 7 · photo 1Step 7 · photo 2Step 7 · photo 3
7
  • Remove damaged bulb by twisting 90° and replace with new bulb.
  • 5007 tail light bulb
  • 7506 brake light bulb
  • 1156 amber turn signal bulb
  • This method can be used on any of the bulbs located in the housing.
Step 8 · photo 1Step 8 · photo 2Step 8 · photo 3
8
  • To reassemble your tail light, follow these instructions in reverse order.

Conclusion

To reassemble your tail light, follow these instructions in reverse order.

Guide content belongs to iFixit, license CC BY-NC-SA. Open original