CARVIN
Difficult30 - 40 min12 steps·Original on iFixit ↗

2019 Chevrolet Traverse Driver Side Trunk Taillight Replacement

Replacing the trunk taillight on a 2019 Chevy Traverse, also known as the rear tail lamp or liftgate taillight assembly, improves visibility and ensures your car remains safe and compliant with the law. The brake light, turn signal, and running light (all of which notify other drivers of your movements) are located in the taillight assembly. Due to dampness or natural wear and tear, these lights may burn out, crack, fog up, or cease functioning, necessitating replacement.

Be conscious of safety precautions before starting the repair: unplug the vehicle's power if you are working near exposed wiring, and handle broken or cracked lenses gently to prevent cuts. This article will help you remove the broken taillight and install a new assembly using a few basic tools.

Tools (3)

Parts (1)

Step-by-step instructions

Step 1 · photo 1Step 1 · photo 2Step 1 · photo 3
1
  • Use a spudger to remove the cap for the screw.
Step 2 · photo 1Step 2 · photo 2Step 2 · photo 3
2
  • Use a socket wrench with an 8mm (5/16) socket to remove the first screw.
Step 3 · photo 1Step 3 · photo 2Step 3 · photo 3
3
  • Use a spudger to pry open the multiple clips on the trunk liner.
  • Repeat the process until the liner is entirely removed.
Step 4 · photo 1Step 4 · photo 2Step 4 · photo 3
4
  • Squeeze and pull the clip away to disconnect the electrical wire from the trunk liner.
Step 5 · photo 1Step 5 · photo 2Step 5 · photo 3
5
  • Pull down the red lock piece to disconnect the head light to the electrical.
  • Use a small pin to push down and pull the two parts apart.
Step 6 · photo 1Step 6 · photo 2Step 6 · photo 3
6
  • Remove the bolts that are holding the taillight in place with a socket wrench that has an 8 mm (5/16) socket attachment.
Step 7 · photo 1Step 7 · photo 2Step 7 · photo 3
7
  • Remove the second bolt holding down the taillight with a socket wrench that has an 8mm (5/16) socket attachment.
Step 8 · photo 1Step 8 · photo 2Step 8 · photo 3
8
  • Remove the two bolts located in the middle of the trunk. This allows the taillight to be removed by using a socket wrench with an 8 mm (5/16) socket attachment.
Step 9 · photo 1Step 9 · photo 2
9
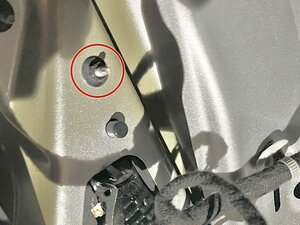
  • To make even more room for the taillight, use a pair of pliers to squeeze the tab and push out the white cap.
Step 10 · photo 1Step 10 · photo 2
10
  • Unclip the headlight by using a spudger to pry the clip back.
Step 11 · photo 1Step 11 · photo 2Step 11 · photo 3
11
  • Apply gentle pressure upward and wait until you hear a suctioning sound.
  • When you hear the sound, push up and slide the taillight out simultaneously.
Step 12 · photo 1Step 12 · photo 2Step 12 · photo 3
12
  • Insert the new taillight, then connect it to the electrical wire and push up the red lock.

Conclusion

To reassemble your device, follow these instructions in reverse order.

Guide content belongs to iFixit, license CC BY-NC-SA. Open original

Замена заднего фонаря багажника со стороны водителя Chevrolet Traverse 2019 — Carvin Garage · Carvin