Guide 4: Roomba 520 Battery replacement, measurements, and testing with a car bulb.
Step-by-step instructions
1
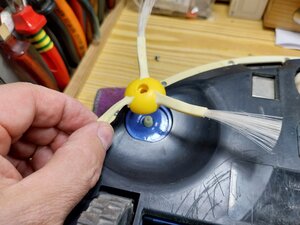
To replace the robot's battery, we must remove the 4 screws from the base; first, remove the side brush by taking out its center screw.
2
The battery does not have any connectors; it is pressure-fitted into the recess, so all you need to do is pull it out using the 2 green side pull tabs.
3
We will compare the value of the replacement battery; generally, as the years go by, the batteries for sale are the same size but with higher capacity.
4
We will check the voltage of the removed battery and the new battery; the new battery's voltage must be higher, exceeding the 14.4 V indicated on the sticker.
5
A very interesting complementary test is to test the new and old battery using an automotive headlight bulb, either a filament or halogen bulb; it should shine at 100% with a new battery.
6
Test the new battery by connecting a 12V 45W lamp or an automotive halogen headlight bulb; the test is successful.
7
With the battery tested, to place it in the robot simply insert it in the only position where it "fits," just as we removed the other one. Replace the cover and insert the 4 screws.
8
Insert the side brush and replace its securing screw.
Other guides in this series: [[Topic:iRobot Roomba 520]]
Guide content belongs to iFixit, license CC BY-NC-SA. Open original
Guide 4: Roomba 520 Battery replacement, measurements, and testing with a car bulb. — Carvin Garage · Carvin