CARVIN
Moderate1 - 4 h15 steps·Original on iFixit ↗

1986-1993 Volvo 240 Front Struts Replacement

Factory dampers should be checked after 50,000 miles to see if they need to be replaced. Whenever working on suspension components you should keep one side completely assembled as a reference.

Tools (15)

Step-by-step instructions

Step 1 · photo 1Step 1 · photo 2Step 1 · photo 3
1
  • Jack up the front of the car and place it on jack stands.
  • Never work on or underneath a car that is only supported by a jack. The jack may slip or fail, resulting in serious injury or even death.
  • Use an impact wrench or tire iron to remove the five 19 mm lug nuts from the front wheel.
  • Pull the front wheel off the wheel lugs and set it aside.
Step 1 · photo 1
1
  • Remove the rubber bump stop from the strut assembly.
Step 2 · photo 1Step 2 · photo 2Step 2 · photo 3
2
  • Use a socket wrench or impact gun to remove the 15 mm nut on the front sway bar endlink.
Step 2 · photo 1
2
  • Use a large adjustable wrench or pair of groove joint pliers to remove the strut gland nut.
Step 3 · photo 1Step 3 · photo 2Step 3 · photo 3
3
  • The front brake lines are attached to the body by a small bracket near the strut.
  • Grab the front edge of the bracket with a pair of locking pliers.
  • Without the locking pliers to hold the bracket in place, it may twist back and forth. This twisting could fracture the rigid brake lines.
  • Remove the 12 mm bolt that holds the bracket in place with a socket wrench.
Step 3 · photo 1
3
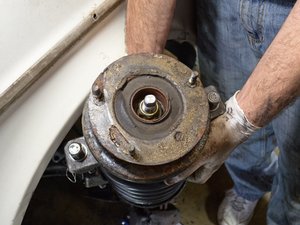
  • Grab the top of the strut and pull it out of the strut assembly.
Step 4 · photo 1Step 4 · photo 2
4
  • Use a socket wrench or impact gun to remove the 19 mm tie rod end nut.
Step 5 · photo 1Step 5 · photo 2
5
  • Place a tie rod end puller over the exposed threads of the tie rod end and turn the puller with a socket wrench to push the tie rod end out of the steering knuckle.
Step 6 · photo 1Step 6 · photo 2Step 6 · photo 3
6
  • The ball joint is held to the control arm by three 18 mm bolts.
  • Remove the bottom two nuts with a breaker bar or long wrench.
  • Place a breaker bar over the gold nut on the bottom of the control arm.
  • The breaker bar alone will not be able to loosen the nut, since the bolt is free to rotate.
  • Place an 18 mm box end wrench over the bolt on top of the control arm.
  • Turn the breaker bar and the wrench in their respective counterclockwise directions to loosen and remove the third ball joint-to-control arm bolt.
Step 7 · photo 1
7
  • Place a jack underneath the ball joint to support it once you remove the 3 ball joint-to-control arm bolts.
Step 8 · photo 1Step 8 · photo 2Step 8 · photo 3
8
  • Open the hood and locate the three strut mounting bolts on the strut tower.
  • Make an alignment mark on the shoe at the dimple in the top of the strut tower before removing the mounting nuts.
  • Use a ratcheting socket wrench or impact wrench with a 13 mm deep socket to remove the three nuts.
Step 9 · photo 1
9
  • Slowly lower the jack and guide the strut assembly down and out of the car.
Step 10 · photo 1Step 10 · photo 2Step 10 · photo 3
10
  • Place spring compressors on opposite sides of the spring.
  • Make sure you are using spring compressors that are meant for MacPherson struts. Internal-type spring compressors will not work.
  • Alternate tightening the spring compressors evenly until you are able to move the entire spring up and down.
Step 11 · photo 1Step 11 · photo 2Step 11 · photo 3
11
  • Use an impact wrench to remove the 24 mm nut at the top of the strut assembly.
  • Remove the strut mount from the strut assembly.
Step 12 · photo 1Step 12 · photo 2
12
  • Remove the upper spring seat and pull the spring off the strut assembly.
  • If you are installing new springs you will need to remove the spring compressors. Loosen each spring compressor evenly, alternating from side to side until they are off the spring completely.
  • When installing new springs you will need to compress them with the spring compressors before placing them on the strut assembly.
  • If you are reinstalling the same springs you may keep the compressors in place until it is time to reassemble the suspension.

Conclusion

To reassemble your device, follow these instructions in reverse order.

Guide content belongs to iFixit, license CC BY-NC-SA. Open original

Замена передних стоек Volvo 240 1986-1993 годов — Carvin Garage · Carvin