CARVIN
Moderate32 шагов·Оригинал на iFixit ↗

1999-2004 Jeep Grand Cherokee WJ Brake Pad Replacement

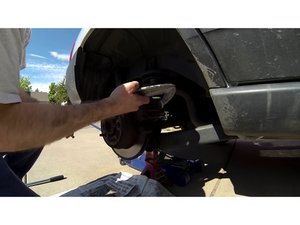
If you are experiencing poor braking performance and or a noise when braking, then it may be time to replace your brake pads.

Applies to most Jeeps with disc brakes, including Cherokee (front), all Grand Cherokees, Liberty, and Wrangler.

Follow this video tutorial by YouTuber FreedivejeepHD to complete the replacement yourself.

Инструменты (12)

Запчасти (1)

Пошаговая инструкция

Шаг 1 · фото 1
1
  • With the transmission in park, firmly set the parking brake
  • [link|https://www.youtube.com/watch?v=3UkRUz5xXL0&t=0.0s|source].
Шаг 2 · фото 1Шаг 2 · фото 2
2
  • Open the hood and locate the brake fluid reservoir at the back of the engine compartment
  • [link|https://www.youtube.com/watch?v=3UkRUz5xXL0&t=44.92s|source].
Шаг 3 · фото 1
3
  • Open but do not remove the cap
  • [link|https://www.youtube.com/watch?v=3UkRUz5xXL0&t=74.76s|source]
  • This allows the brake fluid to be forced back into the reservoir while compressing the brake caliper piston during the removal process
  • [link|https://www.youtube.com/watch?v=3UkRUz5xXL0&t=81.84s|source].
Шаг 4 · фото 1
4
  • If the brake fluid level is at or near the full mark, make room in the reservoir by drawing off enough fluid with a turkey baster to bring the level down near the add mark
  • [link|https://www.youtube.com/watch?v=3UkRUz5xXL0&t=90.44s|source].
Шаг 5 · фото 1
5
  • Before jacking the wheel and tire assembly off the ground, loosen the lug nuts about one quarter turn each
  • [link|https://www.youtube.com/watch?v=3UkRUz5xXL0&t=103.24s|source].
Шаг 6 · фото 1
6
  • Carefully jack one side of the axle high enough to get the respective tire an inch or two off the ground
  • [link|https://www.youtube.com/watch?v=3UkRUz5xXL0&t=113.64s|source].
Шаг 7 · фото 1
7
  • Position your jack stand under the axle tube between the lower control arm mount and the sway bar bushing bracket
  • [link|https://www.youtube.com/watch?v=3UkRUz5xXL0&t=125.56s|source].
Шаг 8 · фото 1
8
  • Carefully lower the axle onto the jack stand, ensuring it will be stable and secure
  • [link|https://www.youtube.com/watch?v=3UkRUz5xXL0&t=135.2s|source].
Шаг 9 · фото 1Шаг 9 · фото 2
9
  • Remove the lug nuts and the wheel and tire, setting them out of the way
  • [link|https://www.youtube.com/watch?v=3UkRUz5xXL0&t=143.2s|source]
  • Be sure to put the five lug nuts in a place they won't accidentally be kicked across the floor
  • [link|https://www.youtube.com/watch?v=3UkRUz5xXL0&t=158.2s|source].
Шаг 10 · фото 1
10
  • Before removing the old brake pads, spread newspaper below the work area
  • [link|https://www.youtube.com/watch?v=3UkRUz5xXL0&t=163.4s|source].
Шаг 11 · фото 1Шаг 11 · фото 2
11
  • Using a brake cleaning solvent of your choice, remove all brake dust residue from the work area
  • [link|https://www.youtube.com/watch?v=3UkRUz5xXL0&t=168.68s|source]
  • Wear safety glasses during this step
  • [link|https://www.youtube.com/watch?v=3UkRUz5xXL0&t=175.52s|source].
Шаг 12 · фото 1
12
  • After the solvent has flashed off, remove the two protective caps that cover the brake caliper mounting bolts
  • [link|https://www.youtube.com/watch?v=3UkRUz5xXL0&t=206.72s|source].
Шаг 13 · фото 1Шаг 13 · фото 2
13
  • To remove the brake pads, first compress the brake caliper piston back into the brake caliper using a large C-clamp
  • [link|https://www.youtube.com/watch?v=3UkRUz5xXL0&t=231.12s|source]
  • Place the top of the clamp on the far side of the brake caliper and the bottom part of the clamp on the backing of the brake pad nearest you
  • [link|https://www.youtube.com/watch?v=3UkRUz5xXL0&t=240.52s|source].
Шаг 14 · фото 1Шаг 14 · фото 2Шаг 14 · фото 3
14
  • As you tighten the C-clamp, the brake caliper piston will be forced back into the brake caliper, allowing clearance to remove the brake caliper assembly off of the caliper mounting bracket
  • [link|https://www.youtube.com/watch?v=3UkRUz5xXL0&t=252.2s|source].
Шаг 15 · фото 1
15
  • Check the fluid reservoir underneath the hood so that you don't overflow the fluid reservoir with brake fluid and spill it into your engine compartment
  • [link|https://www.youtube.com/watch?v=3UkRUz5xXL0&t=282.08s|source].
Шаг 16 · фото 1Шаг 16 · фото 2Шаг 16 · фото 3
16
  • Using a 7mm Allen attachment, remove the upper and lower caliper mounting bolts
  • [link|https://www.youtube.com/watch?v=3UkRUz5xXL0&t=292.2s|source].
Шаг 17 · фото 1
17
  • Gently pry the little clips off with a screwdriver
  • [link|https://www.youtube.com/watch?v=3UkRUz5xXL0&t=353.2s|source].
Шаг 18 · фото 1Шаг 18 · фото 2Шаг 18 · фото 3
18
  • Remove the caliper, inner brake pad, and outer brake pad
  • [link|https://www.youtube.com/watch?v=3UkRUz5xXL0&t=359.84s|source]
  • Do not let the caliper hang by the brake hose
  • [link|https://www.youtube.com/watch?v=3UkRUz5xXL0&t=370.44s|source]; instead, place it on the control arm after removing the inner brake pad
  • [link|https://www.youtube.com/watch?v=3UkRUz5xXL0&t=378.96s|source].
Шаг 19 · фото 1
19
  • The outer brake pad just slides off through the grooves in the caliper mounting bracket
  • [link|https://www.youtube.com/watch?v=3UkRUz5xXL0&t=384.64s|source].
Шаг 20 · фото 1Шаг 20 · фото 2Шаг 20 · фото 3
20
  • Clean the brake caliper and caliper mounting bracket of any braking residue
  • [link|https://www.youtube.com/watch?v=3UkRUz5xXL0&t=404.64s|source].
Шаг 21 · фото 1Шаг 21 · фото 2Шаг 21 · фото 3
21
  • Apply anti-squeal compound to the backing of the new brake pads
  • [link|https://www.youtube.com/watch?v=3UkRUz5xXL0&t=420.68s|source].
Шаг 22 · фото 1
22
  • Reinstall the new brake pad in the caliper
  • [link|https://www.youtube.com/watch?v=3UkRUz5xXL0&t=458.64s|source].
Шаг 23 · фото 1
23
  • Apply a small amount of anti-squeal compound to the caliper mounting brackets
  • [link|https://www.youtube.com/watch?v=3UkRUz5xXL0&t=472.16s|source].
Шаг 24 · фото 1Шаг 24 · фото 2Шаг 24 · фото 3
24
  • Install the new outer brake pad by sliding it into the respective grooves of the caliper mounting bracket
  • [link|https://www.youtube.com/watch?v=3UkRUz5xXL0&t=549.8s|source].
Шаг 25 · фото 1Шаг 25 · фото 2Шаг 25 · фото 3
25
  • If the brake piston is not retracted enough to allow for the additional width of the new thicker brake pads, installing the brake caliper can be more difficult
  • [link|https://www.youtube.com/watch?v=3UkRUz5xXL0&t=574.4s|source].
Шаг 26 · фото 1Шаг 26 · фото 2Шаг 26 · фото 3
26
  • Clean the caliper mounting bolts off with solvent and paper towels
  • [link|https://www.youtube.com/watch?v=3UkRUz5xXL0&t=589.6s|source].
Шаг 27 · фото 1Шаг 27 · фото 2Шаг 27 · фото 3
27
  • Apply a thin coat of high-temperature disc brake grease to the smooth sliding surface of the bolts before reinstallation
  • [link|https://www.youtube.com/watch?v=3UkRUz5xXL0&t=620.6s|source].
Шаг 28 · фото 1Шаг 28 · фото 2Шаг 28 · фото 3
28
  • Tighten the bolts to between 21 and 30 foot-pounds using a torque wrench
  • [link|https://www.youtube.com/watch?v=3UkRUz5xXL0&t=655.6s|source].
Шаг 29 · фото 1
29
  • Reinstall both caps
  • [link|https://www.youtube.com/watch?v=3UkRUz5xXL0&t=685.36s|source].
Шаг 30 · фото 1
30
  • Reinstall the wheel and tire assembly
  • [link|https://www.youtube.com/watch?v=3UkRUz5xXL0&t=692.84s|source].
Шаг 31 · фото 1Шаг 31 · фото 2Шаг 31 · фото 3
31
  • Tighten all five lug nuts in a star pattern, torquing to 95 foot-pounds with a torque wrench
  • [link|https://www.youtube.com/watch?v=3UkRUz5xXL0&t=700.0s|source].
32
  • After lowering the vehicle to the ground, re-torque the lug nuts to 95 foot-pounds.

Завершение

To reassemble your device, follow these instructions in reverse order.

Контент гайда принадлежит iFixit, лицензия CC BY-NC-SA. Открыть оригинал